
 Hope to see you there! Hours are 10:00 to 6:00 on Friday and 10:00 to 5:00 on Sunday. There will be food available on site, and also a great restaurant just down the street called the Pacific Grill if you’re up to a nice lunch where you can sit and fondle your goodies!
Sunday, October 22, 2017
BeadFest Tacoma
Goodness! It’s been awhile since I blogged! In response to a challenge from one of my favorite writers and jewelry designer, Andrew Thornton, I am blogging again.
I am really looking forward to next weekends bead show in Tacoma. The second annual BeadFest will be Friday, Saturday, and Sunday at the Tacoma Convention Center. This show is not to be confused with the Puget Sound Bead Festival that ran for several years. BeadFest Tacoma is hosted by the same group that presents BeadFest Philly, BeadFest Santa Fe, and BeadFest Texas.
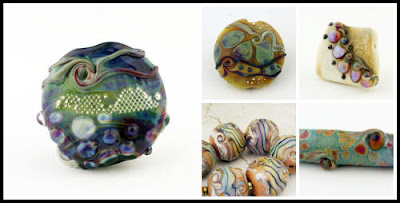
After going through some very tough times in our family, I am ready to get back on track with my glass journey. I’ve made lots of new sets, focals and other goodies to play with, like cabochons, bead cones, headpins, and some cute earring pairs for your designs.
 Hope to see you there! Hours are 10:00 to 6:00 on Friday and 10:00 to 5:00 on Sunday. There will be food available on site, and also a great restaurant just down the street called the Pacific Grill if you’re up to a nice lunch where you can sit and fondle your goodies!
Hope to see you there! Hours are 10:00 to 6:00 on Friday and 10:00 to 5:00 on Sunday. There will be food available on site, and also a great restaurant just down the street called the Pacific Grill if you’re up to a nice lunch where you can sit and fondle your goodies!


Tuesday, September 22, 2015
A Great Little Bead Show
The annual Heart of California Bead and Adornment Expo is in 4 days! This will be the fourth ? or fifth one. It's from 10:00~5:00 Saturday and Sunday. It's held at the Ramada Inn in Fresno. Ahhh...some more Summer weather!
So I've been busy packing beads and clothes to take. Jewelry is polished, (mine as well as a little jewelry to sell) The freezer is full of food for hubby and the laundry is caught up for the moment!
 One of the things I like about this show is that it is mostly small vendors from the local area. Not a lot of imports! It's a friendly venue and Stephanie and Penny go beyond the call of duty to make the vendors feel welcome. The customers are friendly, they offer classes and make and take projects.
If you're in the area, stop by and say hi! And if you would like to vend at the show, please contact them through their website.
One of the things I like about this show is that it is mostly small vendors from the local area. Not a lot of imports! It's a friendly venue and Stephanie and Penny go beyond the call of duty to make the vendors feel welcome. The customers are friendly, they offer classes and make and take projects.
If you're in the area, stop by and say hi! And if you would like to vend at the show, please contact them through their website.
 One of the things I like about this show is that it is mostly small vendors from the local area. Not a lot of imports! It's a friendly venue and Stephanie and Penny go beyond the call of duty to make the vendors feel welcome. The customers are friendly, they offer classes and make and take projects.
If you're in the area, stop by and say hi! And if you would like to vend at the show, please contact them through their website.
One of the things I like about this show is that it is mostly small vendors from the local area. Not a lot of imports! It's a friendly venue and Stephanie and Penny go beyond the call of duty to make the vendors feel welcome. The customers are friendly, they offer classes and make and take projects.
If you're in the area, stop by and say hi! And if you would like to vend at the show, please contact them through their website.
Saturday, August 15, 2015
New Tutorial E Book
Six years ago, I lit the torch for the first time. I was so excited! Since then, I have been in front of that torch for about 5 to 6 hours a day, 6 days a week. I have tried to work on my skills as well as finding a style, (although, I'm still working on that!)
I have also learned a lot about the glass community and one thing I love is that we are all so willing to share information. The old glass beadmakers in Italy always kept their techniques and recipes a secret. So in order to give back to the community, I have had a few free tutorials here on my blog as well as answering any questions n Lampwork Etc. and Facebook forums.
Today, I am happy and proud to announce my first e-book recipe tutorial! It has taken me a couple weeks to put this together as I am not a computer savvy person! But with the help of some friends, here it is!
https://www.etsy.com/listing/243887403/five-favorites-a-lampwork-glass-bead?ref=shop_home_active_1
I hope you enjoy this little e-book and I am certain there will be another "Five Favorites" coming.

Sunday, August 2, 2015
Etching Glass Tutorial
Matte glass beads have such a soft, eye pleasing look to them. I recently had a request for a tutorial on how I acid etch my beads, so here goes!
First, a word about safety. This is a chemical (20% Ammonium Bifluoride) and must be used with safety precautions in place. Gloves, ventilation and some people even wear a mask. The liquid I use is Etchall brand Dip 'n Etch.
 They make a cream too, but I found it very messy. You can find a complete guide to the products here.
http://etchall.com/wp-content/uploads/2015/06/Encyclopedia-of-Etchall.pdf
I am going to etch these pumpkin beads.
They make a cream too, but I found it very messy. You can find a complete guide to the products here.
http://etchall.com/wp-content/uploads/2015/06/Encyclopedia-of-Etchall.pdf
I am going to etch these pumpkin beads.
 Okay...first, you will need designated equipment. I use a yogurt container, gloves, plastic dish, a small strainer and an old towel.
 You will also need some Arm and Hammer washing powder. You can use baking soda but the washing powder is better. It can be found in the laundry detergent aisle.
 Pour about 2-3 teaspoons in the plastic dish and dissolve in water.
 Put your beads into the yogurt container. With gloves on, slowly pour the Etchall over the beads to cover.
 Time depends on the glass and other factors, but I do mine about 3 minutes, stir with a mandrel, (also designated for this purpose. You could use a spoon too, just be sure you mark it somehow) Then set the timer for 3 minutes more. The older your etching liquid, the longer it will take and you can etch the beads longer for a more matte finish. I accidentally left some for about 30 minuted one time and got a very cool rustic artifact look.
When the time is up, carefully pour the liquid back in the bottle using the strainer to catch the beads. Dump the beads into the water/washing soda dish and let sit for about 5 minutes. This neutralizes the acid.
Time depends on the glass and other factors, but I do mine about 3 minutes, stir with a mandrel, (also designated for this purpose. You could use a spoon too, just be sure you mark it somehow) Then set the timer for 3 minutes more. The older your etching liquid, the longer it will take and you can etch the beads longer for a more matte finish. I accidentally left some for about 30 minuted one time and got a very cool rustic artifact look.
When the time is up, carefully pour the liquid back in the bottle using the strainer to catch the beads. Dump the beads into the water/washing soda dish and let sit for about 5 minutes. This neutralizes the acid.
 Rinse with soap and water. If you do get some chalkiness on the beads, I recommend using mineral oil or baby oil on a soft cloth to remove it.
Here is the finished beads!
Rinse with soap and water. If you do get some chalkiness on the beads, I recommend using mineral oil or baby oil on a soft cloth to remove it.
Here is the finished beads!

 They make a cream too, but I found it very messy. You can find a complete guide to the products here.
http://etchall.com/wp-content/uploads/2015/06/Encyclopedia-of-Etchall.pdf
I am going to etch these pumpkin beads.
They make a cream too, but I found it very messy. You can find a complete guide to the products here.
http://etchall.com/wp-content/uploads/2015/06/Encyclopedia-of-Etchall.pdf
I am going to etch these pumpkin beads.
 Okay...first, you will need designated equipment. I use a yogurt container, gloves, plastic dish, a small strainer and an old towel.
 You will also need some Arm and Hammer washing powder. You can use baking soda but the washing powder is better. It can be found in the laundry detergent aisle.
 Pour about 2-3 teaspoons in the plastic dish and dissolve in water.
 Put your beads into the yogurt container. With gloves on, slowly pour the Etchall over the beads to cover.
 Time depends on the glass and other factors, but I do mine about 3 minutes, stir with a mandrel, (also designated for this purpose. You could use a spoon too, just be sure you mark it somehow) Then set the timer for 3 minutes more. The older your etching liquid, the longer it will take and you can etch the beads longer for a more matte finish. I accidentally left some for about 30 minuted one time and got a very cool rustic artifact look.
When the time is up, carefully pour the liquid back in the bottle using the strainer to catch the beads. Dump the beads into the water/washing soda dish and let sit for about 5 minutes. This neutralizes the acid.
Time depends on the glass and other factors, but I do mine about 3 minutes, stir with a mandrel, (also designated for this purpose. You could use a spoon too, just be sure you mark it somehow) Then set the timer for 3 minutes more. The older your etching liquid, the longer it will take and you can etch the beads longer for a more matte finish. I accidentally left some for about 30 minuted one time and got a very cool rustic artifact look.
When the time is up, carefully pour the liquid back in the bottle using the strainer to catch the beads. Dump the beads into the water/washing soda dish and let sit for about 5 minutes. This neutralizes the acid.
 Rinse with soap and water. If you do get some chalkiness on the beads, I recommend using mineral oil or baby oil on a soft cloth to remove it.
Here is the finished beads!
Rinse with soap and water. If you do get some chalkiness on the beads, I recommend using mineral oil or baby oil on a soft cloth to remove it.
Here is the finished beads!

Sunday, June 14, 2015
Post Bead and Button Show
What a great experience Bead and Button show was! I am finally getting back in the groove of my regular routine. Aside from some airline glitches I had a great show. I wish I could have been in two places at once! It was hard to shop with all the great vendors and be at my own booth at the same time. I did manage to do a little shopping of course! It was great seeing all my lampwork friends too.
 It's a huge show, so if you haven't been before, plan ahead and pace yourself. Mark the booths you really want to visit, do a quick walk through and mark your program with the ones you want to go back to. With three and a half days of shopping, it's definitely possible to see it all. There are food vendors inside the Wisconsin Center, one really good one in particular that had great panini sandwiches, soup and the most amazing brownies! They even included some gluten free options.
 One of the highlights for me was being able to see the beautiful winning seed bead designs from the BeadDreamers competition. As a seed beader, I can really appreciate the work that goes into these pieces. I also met some of the designers, like Sherry Serafini, Marcia DeCoster and Phyllis Dintenfass.

 Everyone was very friendly and helpful. I would again like to thank the ISGB for presenting this marketing opportunity and allowing me the chance to do this show. I will be back I'm sure. Now, back to listing beads in my Etsy shop!
 It's a huge show, so if you haven't been before, plan ahead and pace yourself. Mark the booths you really want to visit, do a quick walk through and mark your program with the ones you want to go back to. With three and a half days of shopping, it's definitely possible to see it all. There are food vendors inside the Wisconsin Center, one really good one in particular that had great panini sandwiches, soup and the most amazing brownies! They even included some gluten free options.
 One of the highlights for me was being able to see the beautiful winning seed bead designs from the BeadDreamers competition. As a seed beader, I can really appreciate the work that goes into these pieces. I also met some of the designers, like Sherry Serafini, Marcia DeCoster and Phyllis Dintenfass.

 Everyone was very friendly and helpful. I would again like to thank the ISGB for presenting this marketing opportunity and allowing me the chance to do this show. I will be back I'm sure. Now, back to listing beads in my Etsy shop!
Tuesday, June 2, 2015
Bead and Button Show
The day is near...I leave tomorrow for Milwaukee to attend and sell my wares at my first Bead and Button Show. I would like to again thank the ISGB for this opportunity. I received a place in the show among 2 other artists as a marketing opportunity from the Society after applying about 3 months ago. Bead and Button is the largest consumer bead show in the U.S. it is 2 weeks long with many, many classes by expert teachers. The Marketplace is open to the public starting Thursday evening with a sneak preview and continues through Sunday.  I forget from time to time, how much goes in to doing a show not to mention, putting on a huge show like this. I have been making beads for months to set aside so that I don't deplete my Etsy shop and forget about my loyal customers. Making beads for both has been a challenge. I have a carry-on full of beads and some stashed in my suitcase too! Display items, lights, cords etc. have been mailed to the hotel so they will be there when I get to the check in. List after list of thing to remember, things to take, don't forget this, don't forget that....
 The worst part (if there is one) is not knowing what to expect. Since I have never attended this show, I have no clue as to how many beads to take! But, I can only take so many and whatever is left will be listed in my Etsy shop as soon as I return.


Thursday, April 9, 2015
New Beads
It's been awhile since I've blogged as I'm busy getting ready for Bead and Button show, the largest consumer bead show in the world! I'll be there June 4~7 at the Marketplace. I don't have a booth number yet, but I will be in the artisan row. It's in Milwaukee, Wisconsin at the Wisconsin Center.
Meanwhile, here's some new beads!
 I love the new blue and ivory glass from Effetre called Amazing Avorio. It's got great marbling.


Monday, January 26, 2015
The Elusive Voice
Submitting your work to a juried show can be stressful, or at least leave you feeling anxious and nervous about the outcome. Am I good enough, will the jurors like my work, how will I feel if I'm not approved? I've submitted to several juried shows and have been accepted and turned down! After submitting to a recent show, which I did get in, I received a score and comments from the judges of the show. All the comments were great...except one. That one addressed my need to work on my "unique style". I'm sure the judge was trying to be helpful and supporting, but still a hard pill to swallow. While I try very hard not to copy, and I think my work is unique, it has given me a lot of thought about style. How important is it to you? Lots of people say, "just do what you love!". Others feel it is very important. And what exactly is a style? I think it's a common thread that resonates in the work. A pattern of work that's recognizable.
This article came to me on Facebook...you know, sometimes these things pop up, when you really need them!
How to Find Your Unique Voice and Style.
By Sean McCabe and Ben Toalson. This is a great article for artists and business people alike. They also have several other pertinent articles including How to Be Inspired without Copying. This is one of my favorite lines and really pertains to bead makers.
"If you only have one source of inspiration you are naturally going to imitate them."
I have subscribed to the podcasts from these young men and look forward to seeing what they have to say in the future.
Meanwhile...here's some eye candy!


Wednesday, January 21, 2015
SRAJD

Friday, January 16, 2015
Free Tut Friday!
The second in my Free Tut Friday, we'll explore making headpins. This is a style and technique I cam up with that has been very popular.
 You will need:
Reichenbach Iris Orange #RL- 6208 (aka Raku)
CIM Stone Ground #511251
Effetre Black Transparent #591064
20 Gauge copper wire.
Pliers
Clamp tool
Wire cutters.
Make some twisties with the Iris Orange as a base and Black lines. I pull them about 3mm.
Cut the copper wire about 4" long.
You will need:
Reichenbach Iris Orange #RL- 6208 (aka Raku)
CIM Stone Ground #511251
Effetre Black Transparent #591064
20 Gauge copper wire.
Pliers
Clamp tool
Wire cutters.
Make some twisties with the Iris Orange as a base and Black lines. I pull them about 3mm.
Cut the copper wire about 4" long.

 To hold the wire, I use a "Broach Holder" from Arrow Springs, but you can use hemostats or even make one of these with an alligator clip. Some people also use a pin vise, but I find it cumbersome to get the wire out and into the kiln.
 Heat a gather of Stone Ground and barely heat the end of the copper wire. Apply the gather to the wire. This takes several applications. Remember, hot glass does not stick to hot glass, so take the bead out of the flame to apply the new hot glass. It should end up about 8 to 10mm. Be sure you keep the wire out of the flame or it will burn right though it.
 Next apply the twistie in a sort of back and forth "S" around the bead.
 Heat to melt in still keeping the wire at the edge of the flame, only the bead should be in the flame.
 Don't let it get too drippy either! When the twistie is all melted in, hold the bead upside down so the gravity will form it's shape. Sorry for the blurry photo, the camera phone does not want to focus on the bead!
 Last step is to slowly heat the bead for about 5 seconds at the top of your flame. This will help bring out the colors in the raku. They will develop more in the kiln too, so don't overdo it! Pop it in the kiln by unlatching it from the clip.
After annealing, I swipe the wire with steel wool, then polish with Renaissance wax to prevent further rusting.
Last step is to slowly heat the bead for about 5 seconds at the top of your flame. This will help bring out the colors in the raku. They will develop more in the kiln too, so don't overdo it! Pop it in the kiln by unlatching it from the clip.
After annealing, I swipe the wire with steel wool, then polish with Renaissance wax to prevent further rusting.
 I hope you enjoy making these, they can be addicting!


Friday, January 9, 2015
Southwest Summer Beads
Welcome to my first blog tutorial! This is a simple design, using the Zoozii's Chunky Crystal Trio press.
 A popular color combination, these beads have sold extremely well for me. You will need: CIM Celadon #511402
Effetre Coral La Mesa #591420
Effetre Apricot Orange #591419 (the batch out now is much more orange, so if you can get any of the older batch it's more yellow, and Effetre Orange Zucca might be a good substitute)
You will also need some silvered ivory stringer and fine silver wire, 28 or 30 gauge.
Pull some 2 to 3mm stringer with the Celadon.
A popular color combination, these beads have sold extremely well for me. You will need: CIM Celadon #511402
Effetre Coral La Mesa #591420
Effetre Apricot Orange #591419 (the batch out now is much more orange, so if you can get any of the older batch it's more yellow, and Effetre Orange Zucca might be a good substitute)
You will also need some silvered ivory stringer and fine silver wire, 28 or 30 gauge.
Pull some 2 to 3mm stringer with the Celadon.
 Make a small bead out of the Coral La Mesa, about 8mm. TIP, *The glass you use first uses more* Next add right next to, and overlapping the coral, the Apricot.
 Melt together and press in the 14mm cavity of the press. Remember, you are going to be adding more glass, so it should not fill the cavity yet.
 Apply the Celadon stringer around the center of the bead, melt in and press again.
 Next apply silvered ivory stringer on both sides of the Celadon, melt in and press. Your bead should now fill the cavity. if it squeezes out on the corners, you have too much glass. If it's not too much, you can warm it a little and repress. Sometimes that works to smooth out the edges. Also, remember not to press too hard, let the weight of the press do the work.
 Now you are ready to add the fine silver wire. Holding the end of the wire and the bead just under the flame, position the wire where you want it and bring the bead slowly up the the flame until it catches on the glass. Your bead should be pretty warm too. Wind the wire around and melt off the end, then melt on the rest of the wire at the top of the flame. Make sure you melt it in good so the drops of silver won't fall off. If your bead gets too roundy for your taste, you can give it another press. Pop it in the kiln to anneal.
 Sorry that last photo is blurry!
This combination makes a great focal bead too! Here's one where I added a section of EDP. (Effetre #591254)
Sorry that last photo is blurry!
This combination makes a great focal bead too! Here's one where I added a section of EDP. (Effetre #591254)


Friday, January 2, 2015
Art Bead Scene Blog Winners Announced


Tuesday, December 30, 2014
Happy New Year!
And now let us welcome the New Year
Full of things that have never been.
~Rainer Maria Rilke
 It's kind of odd how we mark one year into the next when in reality, it's just another day. Without clocks or calendars we would never know and probably wouldn't care. But in our busy lifestyles, we are constantly reminded of time. What do you dream of for the coming year? Your dreams can come true...write them down and create a plan. Follow your heart, do what you love and find your passion! I have been fortunate in my life to have found glass. I hope to bring you many new beads in the coming year. I plan new classes and shows, learning from my peers while finding inspiration in my constant love of nature, art, textiles and not to mention, Google images! Happy New Year!!


Saturday, December 13, 2014
December ABS Challenge
Meant to post this sooner, but it is a busy month for everyone, I'm sure! Art Bead Scene Blog has a monthly challenge and the December one is a very nice palette to work with, very neutral.
I love working with a neutral color palette like this, there are so many options, especially in gemstones. Lampwork beads also offer a wide variety of neutrals.

 Bead makers can enter this challenge also and win a months worth of free advertising! Just make a bead in the color challenge tones and enter on the Pinterest page.
I hope to be blogging on a regular basis next year, so keep an eye out for lampwork and bead design tips and tricks as well as some of my own glass recipes and free tutorials.
Bead makers can enter this challenge also and win a months worth of free advertising! Just make a bead in the color challenge tones and enter on the Pinterest page.
I hope to be blogging on a regular basis next year, so keep an eye out for lampwork and bead design tips and tricks as well as some of my own glass recipes and free tutorials.

 Bead makers can enter this challenge also and win a months worth of free advertising! Just make a bead in the color challenge tones and enter on the Pinterest page.
I hope to be blogging on a regular basis next year, so keep an eye out for lampwork and bead design tips and tricks as well as some of my own glass recipes and free tutorials.
Bead makers can enter this challenge also and win a months worth of free advertising! Just make a bead in the color challenge tones and enter on the Pinterest page.
I hope to be blogging on a regular basis next year, so keep an eye out for lampwork and bead design tips and tricks as well as some of my own glass recipes and free tutorials.
Monday, December 1, 2014
Facebook Sale!
 A quick blog this morning before I hop off to the dentist! I am having a Facebook sale on some beads I just listed in my Etsy shop. Be sure to Like my business page to get in on marked down NEW beads! For FB only!
https://www.facebook.com/pages/Stone-Designs-Lampwork-Glass-Beads-and-Art-Jewelry/288413853646
A quick blog this morning before I hop off to the dentist! I am having a Facebook sale on some beads I just listed in my Etsy shop. Be sure to Like my business page to get in on marked down NEW beads! For FB only!
https://www.facebook.com/pages/Stone-Designs-Lampwork-Glass-Beads-and-Art-Jewelry/288413853646

Tuesday, November 4, 2014
Art Bead Scene
On a whim, I entered the monthly challenge for October from Art Bead Scene blog, one of the most popular bead blogs. The inspiration was a painting from Milton Avery.
 I made a bead for the challenge as they now have a "bead only" category as well as the jewelry category. You can view all the entries on their Pinterest board.
http://www.pinterest.com/artbeadscene/jewelry-monthly-challenge-entries/
I love a challenge so this is the bead I made inspired by the painting.
I made a bead for the challenge as they now have a "bead only" category as well as the jewelry category. You can view all the entries on their Pinterest board.
http://www.pinterest.com/artbeadscene/jewelry-monthly-challenge-entries/
I love a challenge so this is the bead I made inspired by the painting.
 I entered my bead and received notice that I had won the random winning bead! I am excited to have won 2 months free advertising on one of the largest bead blogs. Thank you Art Bead Scene! Congratulations are in order too for all the entries and other winners in this challenge. November challenge painting is right up my alley...a gorgeous floral with soft lighting and botanical feel. I love it! We'll see how this one comes out...

 I made a bead for the challenge as they now have a "bead only" category as well as the jewelry category. You can view all the entries on their Pinterest board.
http://www.pinterest.com/artbeadscene/jewelry-monthly-challenge-entries/
I love a challenge so this is the bead I made inspired by the painting.
I made a bead for the challenge as they now have a "bead only" category as well as the jewelry category. You can view all the entries on their Pinterest board.
http://www.pinterest.com/artbeadscene/jewelry-monthly-challenge-entries/
I love a challenge so this is the bead I made inspired by the painting.
 I entered my bead and received notice that I had won the random winning bead! I am excited to have won 2 months free advertising on one of the largest bead blogs. Thank you Art Bead Scene! Congratulations are in order too for all the entries and other winners in this challenge. November challenge painting is right up my alley...a gorgeous floral with soft lighting and botanical feel. I love it! We'll see how this one comes out...

Subscribe to:
Posts (Atom)


 Posts
Posts


